With warmer weather on the horizon, now is a great time to spring clean your coop and take stock of your poultry equipment.
Utilising the warmer weather to clean and disinfect your chicken coop which would have been heavily used over winter will prepare your flock for the warmer months. Spring cleaning your coop will allow ventilation to be effective, reduce red mites before they become more active and will remove any over wintering pathogens from surfaces such as respiratory viruses, bacteria and parasitic wasps. For the most effective clean we recommend spring cleaning on a day when your birds are outside ranging.
These steps will help ensure a deep spring clean throughout your coop.
Step 1: Remove everything from the coop
Wearing a pair of gloves and a face mask, remove everything from the coop, including feeders, drinkers, perches, nesting boxes and used bedding.
Step 2: Wipe down surfaces
After everything has been removed scrape any faeces, cobwebs and dust out of the coop, this can be removed using a heavy-duty brush.
Step 3: Drench the coop
Wash down surfaces to loosen any areas that were unable to be removed using a brush and leave to dry.
Step 4: Use a detergent
Once the majority of dust, spider webs and faeces have been removed, introduce a de-greasing detergent to break through the oily layers that have formed from faecal build up and feather dust. Leave for 30 minutes, then wash off with warm water. Make sure you then leave the coop to dry.
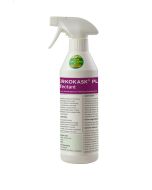
Step 5: Use a disinfectant
Use a suitable disinfectant. We recommend using Interkokask. It is critical that you use the disinfectant at the recommended dilution rate and that it’s sprayed onto a dry surface to be most effective.
Step 6: Allow surfaces to dry thoroughly after cleaning
Step 7: Replace your poultry equipment